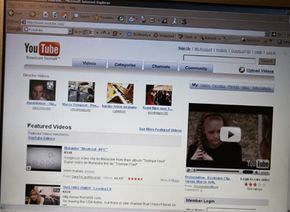
Getting started with video sharing is easy. You'll need three things to record and share videos online:
- A device for recording digital video: digital camcorder, digital camera, camera phone or Web cam
- A computer
- An Internet connection, preferably broadband
There are two options for getting your video from your camera to a video-sharing Web site: with video-editing software or without video editing software.
Some video-sharing sites, like YouTube and Blip.tv, allow you to record video directly onto the Web site without any special software. Direct recording is particularly useful for video bloggers, or vloggers, who enjoy being able to post quick video messages directly from their Web cam. Here's how direct recording works:
- Connect your video recording device to your computer using the USB or Firewire cable that comes with the device. If you have a built-in Web cam, that'll be the default recording device.
- Go to the direct recording section of the video-sharing site. On YouTube it's called "Quick Capture."
- Turn on your recording device and press the record button on the Web site.
- When you stop recording, the video-sharing site will optimize and compress the video clip.
- The new clip will automatically appear on the Web site, no editing or uploading required.
Another way to record and upload video onto a video-sharing Web site is to use video-editing software like Movie Maker, iMovie or Final Cut Pro. Once you've recorded the video onto your camcorder or other digital recording device, you need to import it onto your computer using the video editing software. Exactly how you import the video depends on what type of recording device and which software program you're using.
The advantage of video editing software is that you can combine multiple video clips into the same movie, add titles and transitions (fade in, fade out, dissolve), special effects and music soundtracks.
When you're done editing the movie, you need to compress the movie file so that it's small enough to play on a video-sharing Web site. Compression is handled by the Export command on most video-editing software programs. In the export menu, you can indicate the final movie file's size by choosing its resolution and frame rate. A higher resolution and frame rate makes the video clip play smoother and clearer, but leads to higher file sizes. You can also choose the file type: Windows .AVI, QuickTime .MOV or one of various .MPG files.
YouTube, for example, recommends an MPEG4 file format at 640x480 resolution and 30 frames per second. YouTube also has a file size limit of 1GB (gigabyte) and a maximum clip length of 10 minutes.
Now that you've edited and compressed your movie file, you're ready to upload it to one or several video-sharing Web sites. Most of these sites have a prominent Upload button or Upload link on the home page. Click on the link and follow the directions. Most sites will ask you to name the clip, give it a short description and assign it some keywords or tags.
You'll also be asked if you want the clip to be public or private. If it's public, it'll be searchable and accessible to anybody on the video sharing site. If it's private, only people with the direct link to your video can watch it. Finally, you'll indicate which movie file you want to upload.
So which is the best video-sharing site to use? Keep reading to find out.


